Mounting the Ceiling Fan Electrical Wire Box to the Cross Support and Installing the Cable |
|
 |
 |
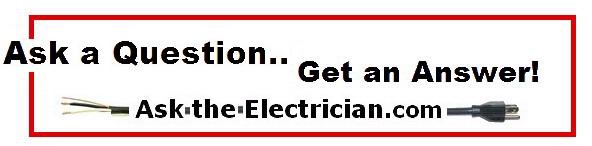
| The Attic electrical wiring is secured to the cross piece. | The Cable and block are ready for ceiling fan wire box. |
 |
 |
| Wire into Ceiling Fan Electrical Box Ceiling fan cable is protected using an insulated bushing. |
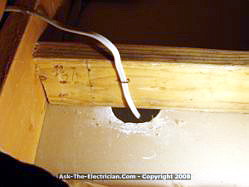
Ceiling Fan Wiring Box Mounted Ceiling fan box is mounted to the cross support wood block. |
 |
 |
| Ceiling Fan Ground Wire Ceiling fan ground wire is bonded to the box. |
Ceiling Fan Cradle Bracket The ceiling fan cradle assembly is mounted. |
With the ceiling electrical box mounted in place I am ready for the ceiling fan cradle bracket. After stripping the cable and cutting away the outside sheath cover, I feed the wires through the center opening of the bracket. When using a remote control module the wires can be brought down on the side of the bracket to allow space for the module to slide into place above the ceiling fan stem. See more about: |
|
 |
 |
| Ceiling Fan Electrical Wiring The electrical wires are ready to be connected with the ceiling fan. Notice the wiring from the electrical box and the green ground wire attached to the ceiling fan mounting bracket. |
Electrical Wires Connected to Ceiling Fan The ceiling fan mounting assembly is in place and the connected electrical wires and wire connectors are gently folded into the open canopy space where they will be protected when the final cover is installed.. |
 |
 |
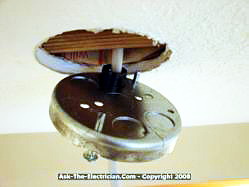
| Ceiling Fan Canopy The ceiling fan canopy cover is placed over the mounting assembly and the screws have been installed. |
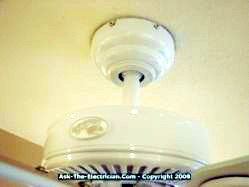
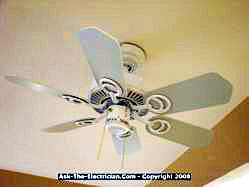
Ceiling fan blades mounted The ceiling fan blades are mounted to the ceiling fan motor after the electrical wire connections are made and the cover has been installed. |
| Installing the ceiling fan motor assembly requires paying attention to what needs to be placed on the stem of the assembly and in what order. For example the canopy which covers the ceiling fan box and cradle bracket needs to slide over the stem before this assembly goes in place,.Otherwise once you discover this vital piece is missing everything needs to be undone and the assembly taken down and the canopy put in place. | Also be aware that some ceiling fans come with a plastic ring which slides up around the canopy to fit tight against the ceiling to hide the canopy mounting screws. Another part that is easy to miss on some ceiling fans is a small cap that covers the top of the motor where the stem attaches. This is usually included with fans that have a longer stem. |
 |
 |
| Wiring a Double Switch or a Stack Switch A tandem double switch or stack switch will be used to control the ceiling fan motor and the ceiling fan light. This type of switch provides two separate switches from one space of one single space. |
Installing the Double Stack Switch The stack switch or double switch mounts nicely next to an existing light switch This type of installation uses the existing electrical box and prevents having to replace the wall box with a larger wiring box.. |
 |
Details about wiring the switch A double stack switch enables two switches to be installed into the space of one single switch, this way you will have a few options for wiring as you desire, such as wiring so the top switch controls the light and the bottom switch controls the fan motor. One side of the switch is where the power is connected and the other side has a separate connection for each function. |
Additional ResourcesMetal Electrical Box Ceiling Fan Installation Manual |
|
Here is the Detailed Instruction Manual for the Ceiling Fan Metal Pan Box [PDF] |
More about Wiring a Ceiling Fan
|