


Repair Water Damaged Electrical Equipment
 '; ';
|
How can I Restore a Water Damaged Electric Motor and Electrical Equipment? How to Repair Water Damaged Motors and Electrical Equipment, The Process to Help Restore Water Damaged Electrical Equipment. © By: Dave Rongey |
Water Damaged Electrical Motors and Equipment
Electrical Question: How can I Restore a Water Damaged Electric Motor and Electrical Equipment?
I’m trying to salvage an air compressor that was submerged, for about 6 hours, in flood water. The mechanical part (the pump) works fine. On the electrical side, there is a small 15 amp circuit breaker, a capacitor and the motor. The motor spins freely and looks fine but when I plug it into the 120Volt outlet and then turn the switch on, I blow the circuit breaker at the electrical panel!
What I’ve done so far:
- I’ve disconnected the motor from the on/off switch in order to test the switch. The switch seems to be fine: it shows 120VAC at the motor side of the switch when it’s ON and no voltage when the switch is OFF, and all without blowing the circuit breaker at the panel.
- I’ve tested the capacitor by using a 9VDC battery and it seems ok: when I apply the 9VDC and monitor using my volt meter, I see that the DC voltage immediately measures 9VDC and then starts to diminish. Also, when I remove the capacitor from the circuit (thereby, eliminating it), I still blow the circuit breaker at the electrical panel.
- My visual inspection of the motor shows no rust or water in any part of the motor visible through the ports. It looks like it always did!
Can you please tell me what might be the problem here? I’d hate to have to throw this compressor out because everything is clean and moves freely.
Thanks,
John
This home electrical repair question came from: John, from Brick, New Jersey.
Dave’s Reply:
Thanks for your electrical repair question John.
How to Repair Water Damaged Motors and Electrical Equipment
Application: Repair Water Damaged Electric Motor.
Skill Level: Intermediate to Advanced – Best performed by a Qualified Electrician or Electrical Contractor.
Tools and Testers Required: Basic Electricians Pouch Hand Tools, Voltage Tester, Continuity Tester and Megger Meter.
Estimated Time: Depends on the complexity of the water damaged electrical equipment.
Precaution: Identify the circuit which provides power to the equipment, turn it OFF and then Tag it with a Note before performing any inspections and repairs.
Note: Water damaged equipment is best repaired by a qualified electrician or electrical contractor.
The Most Common Process to Help Restore Water Damaged Electrical Equipment
Guide to Repairs for Water Damaged Equipment
Water soaked electrical equipment can be restored when preventive procedures are taken such as the following:
- Turn off the electrical circuit power to the water damaged electrical equipment. Attempting to operate the equipment may cause permanent damage.
- Locate equipment restoration products that are designed to help restore water damaged electrical equipment such as the line of products available from the CRC company. Make sure to read all directions before using each product.
- Corrosion damage will begin to occur when the water is drained or dispersed therefore procedures must be performed without delay to prevent escalating corrosion damage.
- Clean the equipment by removing any soil or contaminants from the water damage. Open or remove all covers to enable access to the electrical wiring and components. Flush or spray the equipment with clean water and a water based cleaner to remove contaminants then allow to drain.
- Apply an electrical approved cleaner or degreaser to remove contamination that was not removed by the flushing process. Also spray the control boxes or junction boxes to rinse and clean as needed and then allow to air dry.
- Saturate the inside and outside of the equipment with a moisture displacement lubricant and allow to drain. Repeat the process until contaminants are not visible.
- After the equipment has drained measure to verify the minimum resistance levels for the specific equipment and components. If the resistance levels are not correct then try to isolate the area or component and perform further inspections, flushing and cleaning as necessary.
- Apply a precision cleaner to remove any remaining soil particles before energizing.
- When megger resistance readings are normal the equipment may be tested under a no-load condition where the equipment may be allowed to run for a period of time that will allow further drying while under normal operating conditions.
More about Electrical Equipment and Electric Wiring
Basic House Wiring Electric Circuits

-
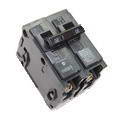
House Wiring Circuits and Circuit Breakers
- 120 volt and 240 volt house wiring circuits and the circuit breakers that are installed identifying the types and amperage sizes used in most homes.
Electrical Panel Circuit Listing

-
Electrical Circuit Wiring
- Review of 120 volt and 240 volt circuits and breakers that are installed, identifying the types and amperage sizes used in most homes.
Home Electrical Panel Circuit Listing
Home Electrical Circuit Breakers
-
Home Electrical Circuit Breakers
- A guide to home electrical circuit breakers and how they work to protect your electrical wiring. When properly installed, your home electrical wiring is protected by a circuit protection device.
How to Troubleshoot Electrical Wiring Problems
Guide to Electrical Testers and Voltage Meters
-
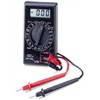
Understanding Digital Volt Meters
- When working on home electrical wiring using voltage meter can play an important part in electrical safety. Electrical testers and voltage meters enable you to identify electrical circuits and help prevent the possibility of accidental electrical shock.
The following may also be helpful for you:
Be Careful and Be Safe - Never Work on Energized Circuits!
Consult your Local Building Department about Permits and Inspections for all Electric Wiring Projects.
More articles about Electrical Repair and Home Electrical Wiring: |
|
| « Previous | Next » |
How to Identify Electrical Problems |
How to Install New Wiring |


