


Bath Exhaust Fan Wire Connections

|
How do I wire the wall switch wires for my bathroom exhaust fan wires? Wiring Connections for an Exhaust Fan, How to Connect the Wires of a Bath Exhaust Fan. © By: Dave Rongey |
Guide to Wiring Connections for a Bath Exhaust Fan
Electrical Project: How do I wire the wall switch wires for my bathroom exhaust fan wires?
- I am installing an exhaust fan in my bathroom.
- One black and white wire is coming from panel and other one coming from the on and off switch.
- Please guide me how to connect these wire to the fan.
- The fan is simple with black and white wire.
This electrical wiring question came from: Ram, a Homeowner from Toronto, Canada.
Additional Comments: Very informative.
Dave’s Reply:
Thanks for your electrical wiring question Ram.
How to Connect the Wires of a Bath Exhaust Fan
- Application: Wiring a Bath Exhaust Fan.
- Skill Level: Beginner to Intermediate – Best performed by a Licensed Electrician.
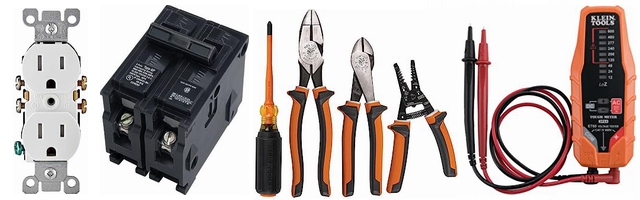
- Tools Required: Basic Electricians Pouch Hand Tools and Voltage Tester.
- Estimated Time: Depends on personal level experience and ability to work with tools.
- Precaution: Identify the bathroom light circuit, turn it OFF and Tag it with a Note before working with the wiring.
Wiring Connections for an Exhaust Fan
- Overview of Wiring
- Wiring switched power for a bathroom exhaust fan is basically the same as wiring a light switch.
- This example describes the wiring connections where the power source and the exhaust fan wires are located in the wall switch box.
- Identify the Power Source and Exhaust Fan Wires
- Identify the cable which supplies the wires from the circuit power source. This is typically a 2-wire cable with a black and white wire and a ground wire.
- A careful test using a non-contact tester of the black wire will indicate the power source.
- Splicing the White Neutral Wires
- Neural wires are not attached to the switch, but are spliced together.Sometime white wires are attached to a switch, however that is because the white wire is being used as a switched leg of the power wiring.
- The white neutral wire of the power source and the exhaust fan are spliced together using a yellow or red wire connector.
- Wiring the Switch
- A single pole switch is not polarized, so it does not matter which of the black wires are placed on the two brass screws of the switch.
- Strip off the insulating about an inch from the end of each of the black wires of the power source and the exhaust fan.
- Attach each of the black wires to the brass terminal screws on the side of the switch so the loop of the wire will be facing in a clockwise orientation with the wire loop directly under the head of the screw.
- Using a flat blade screwdriver tighten each screw down firmly to create a solid connection.
- Grounding the Components
- The circuit ground wires are the most important wires of the circuit because they protect the circuit components in the case of circuit overload or short circuit conditions.
- Ground wires are spliced together and bonded to the switch and to metallic switch boxes, as well as the device, which in this case is the exhaust fan.
- The bonding process of the ground wire of the circuit involves attaching a lead of the ground wires to a green grounding screw on the frame of the switch, a green grounding screw of the switch box and the exhaust fan enclosure. Some exhaust fans will supply a pre-wired bonded green ground wire which is used for the connection with the ground wire.
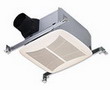
- Wiring the Exhaust Fan
- A typical exhaust fan will have a set of wires located inside the junction box which is located a part of the exhaust fan enclosure.
- The entry hole for the cable to be connected to the exhaust fan must be fitted with a cable connector which will insulated and protect the cable. This can be either a 2-screw connector, or a plastic insulated cable connector.
- Strip off the insulating about an inch from the end of each of the black wire of the cable at the exhaust fan.
- Create a splice for each pair of wires, color to color, and complete each splice using a yellow or red wire connector which is fastened firmly to create a secure splice.
More about Wiring a Bathroom Exhaust Fan
How to Install and Wire a Bathroom Fan
- Bathroom Exhaust Fan
- Answers to all of your questions about installing a bath exhaust fan and your bathroom exhaust fan replacement project.
- Bathroom Electrical Wiring
- Fully Explained Photos and Wiring Diagrams for Bathroom Electrical Wiring with Code Requirements for most new or remodel projects.

- Wiring a Light Switch – Diagram 1
- Fully explained pictures and wiring diagrams about wiring light switches describing the most common switches starting with photo diagram 1.
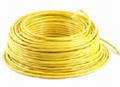
- Electrical Wire for the Home
- Complete listing of electrical wire types and parts used for home projects with electrical code information serves as selection guidelines.
The following may also be helpful for you:
|
|

Be Careful and Be Safe - Never Work on Energized Circuits!
Consult your Local Building Department about Permits and Inspections for all Electric Wiring Projects.


More articles about Electrical Wiring, Exhaust Fan and Home Electrical Wiring: |
|
| « Previous | Next » |
Problems that Can Cause Dim Lights |
Replacing a Standard Wall Outlet |


